After having this happen (a time or two) I devised the plan of using 4 10/32"x3/8" set screws. Mind you, this works fine but if you remove the saddle for cleaning, you are back trying to get the saddle "back where it was".
The next step came as an epiphany over a cup of coffee early one morning. I thought, "why not devise a saddle stop for the cheek piece?". A short time later found me at the local "Nuts-N-Bolts" shop aka the hardware store. After a short shopping session, I walked out with the "pieces-parts" for the handy-dandy Shithouse Sniper Saddle Stop Mod! PS, don't ask how I got the nickname of "The Shithouse Sniper!!
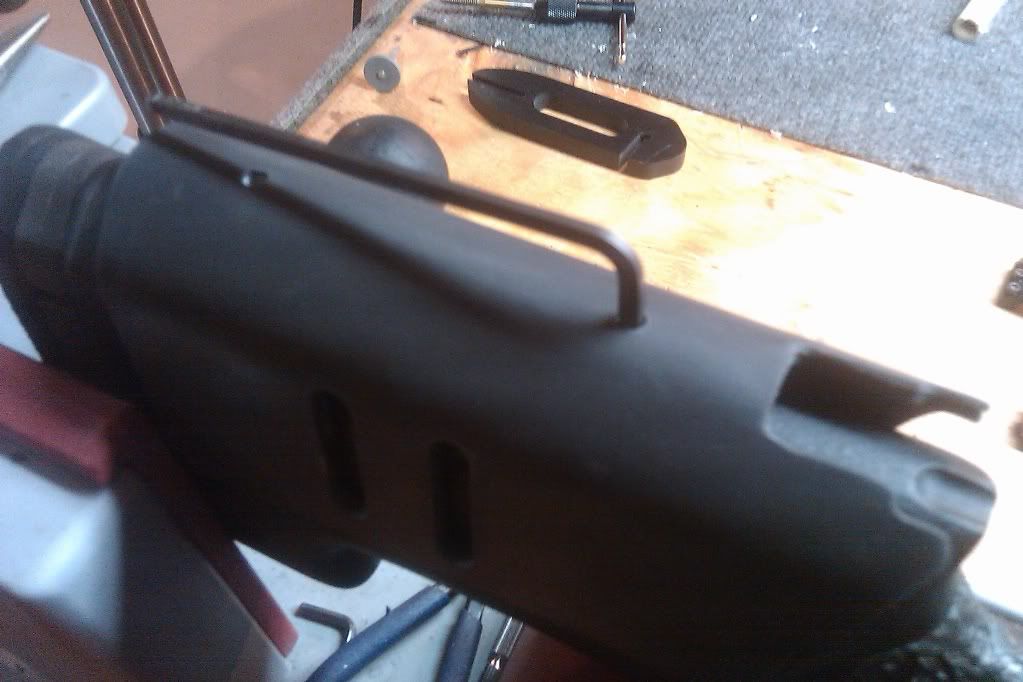
Here's whatcha need.....
(2) 1/4x20 round head machine screws 1" in length
(1) 1/4x20 tap
(2) 3/16" I.D. cable stops (aluminum)
(4) 10/32"x3/8" set screws (optional)
Epoxy of some sorts (used Marine-Tex here)
Release agent (neutral Kiwi, Johnson Wax, etc.)
I'll outline the steps from start to finish as I went through the process.
1. Take your two 3/16" I.D. cable stops and your tap. As these are drilled 3/16" I.D. already, no drilling is required. Tap through both cable stops, these will serve as your pillars and allow for your adjustment. Also, rough up the exterior of the pillars for the epoxy to adhere to.
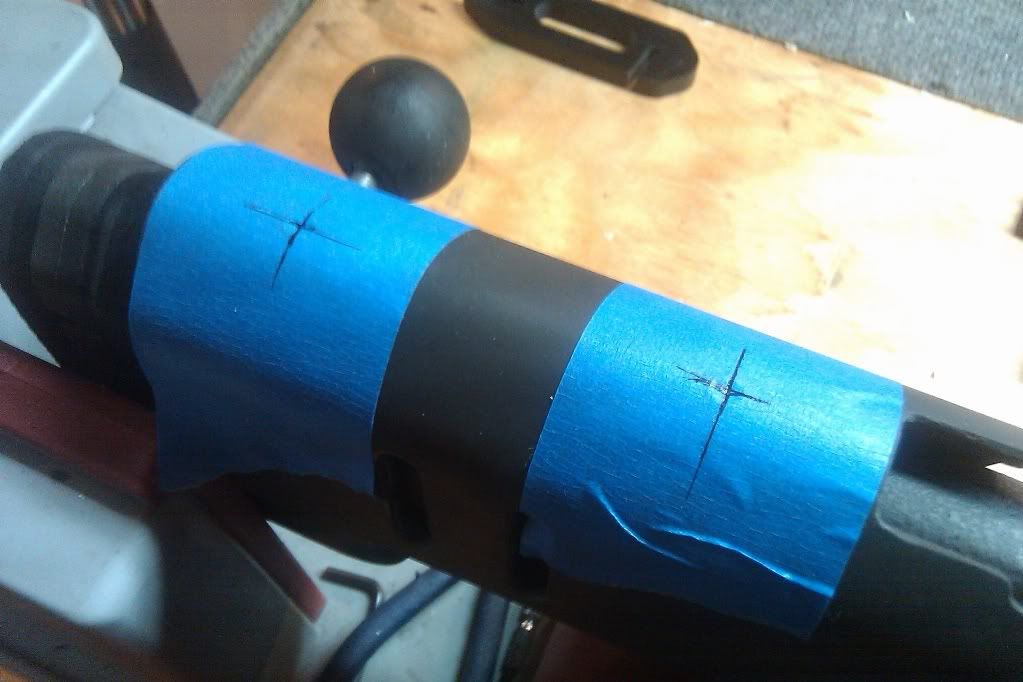
2. Using masking/painters tape, place a strip both fore and aft on the saddle in relations where you want the stops/adjusters at. Measure the distance on both ends and decide where you want to locate your "through holes" for adjustment. Afterwards, find the center of your cheekpiece and mark (on your tape) where you're going to drill. See the pic below......
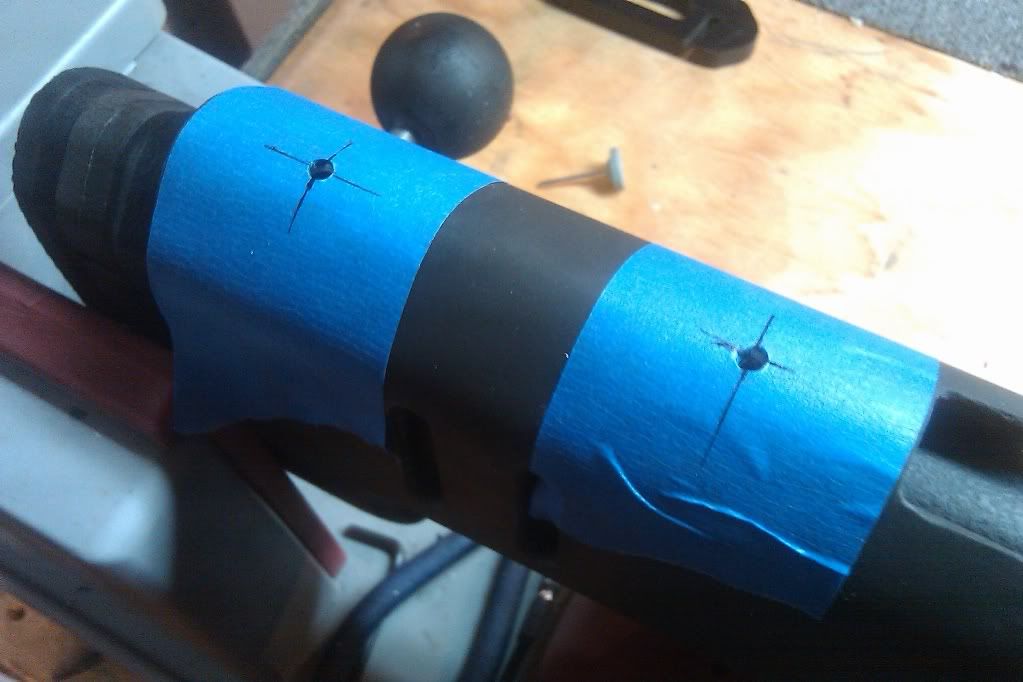
3. Bottom the saddle out on the stock and lock it down. Next, using a drill bit slightly larger than a 5/32" allen wrench, drill through the saddle on your marks and slightly into (1/8" or so) into the stock itself. See next pic.....
4. After you have completed step 3, remove the saddle and set it aside. This next step can be completed with a hand drill if you are steady of hand and have a calibrated eye-ball. I, on the other hand, set the stock up in my cross-slide vise on a drill press for the next few steps.
Now, after we have it set up and ready to drill, use a bit slightly larger than the shank of the screw (5/16 bit). This will lay out our holes for the adjusting screws. As I chose 1" long screws, I opted to go about 1 1/2" deep here. Note- Remove the upper butt pad screw if you have the adjustable LOP spacers. It'll have to be trimmed about 1/2" to clear the rear pillar. Drill the stock for these in the dimples we drilled in step 3. Once you have both these drilled to depth, it's time to swap to a larger bit for our pillars we made in step 1.
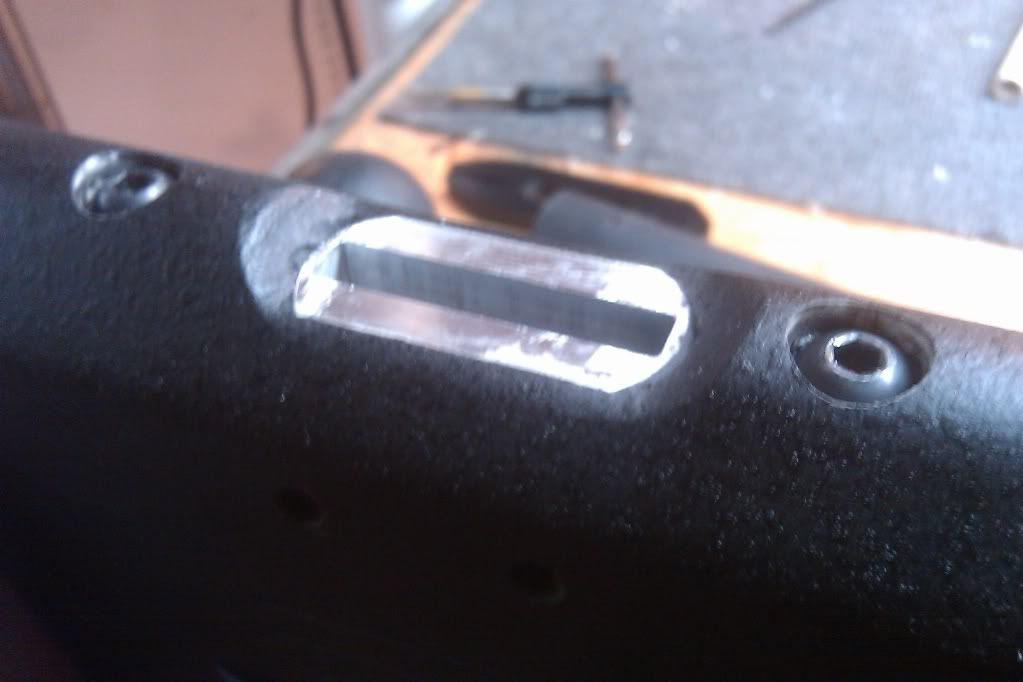
5. We need a bit ever so slightly larger than our pillars. The cable stops I bought were just under 1/2" O.D. For this step, I used a 31/64" bit for my pillars. Measure the height of the pillars and allow for the head of your screw. Drill down just deep enough to countersink the pillar below the comb of the stock with the screw threaded in and bottomed out. See the next pic.....
6. Now we're cooking with gas AND lard!!!!!! Using some sort of release agent (neutral Kiwi used here), coat both screws from top to bottom. This will ensure that we don't glue the screws in when we bed our pillars. Clean the pillars with denatured alcohol or acetone and let dry. After they have dried, thread the screws through the pillars and bottom them out. Take your epoxy and put a dab in both holes we drilled in our stock. Note- A little dab'll do and we only need to put the epoxy in the countersink for the pillars.
Now install your pillars in the holes. You'll see a little run up over the edge of the pillar onto the screw head. As I used Marine-Tex, I used a Q-tip with WD40 to clean up the excess.
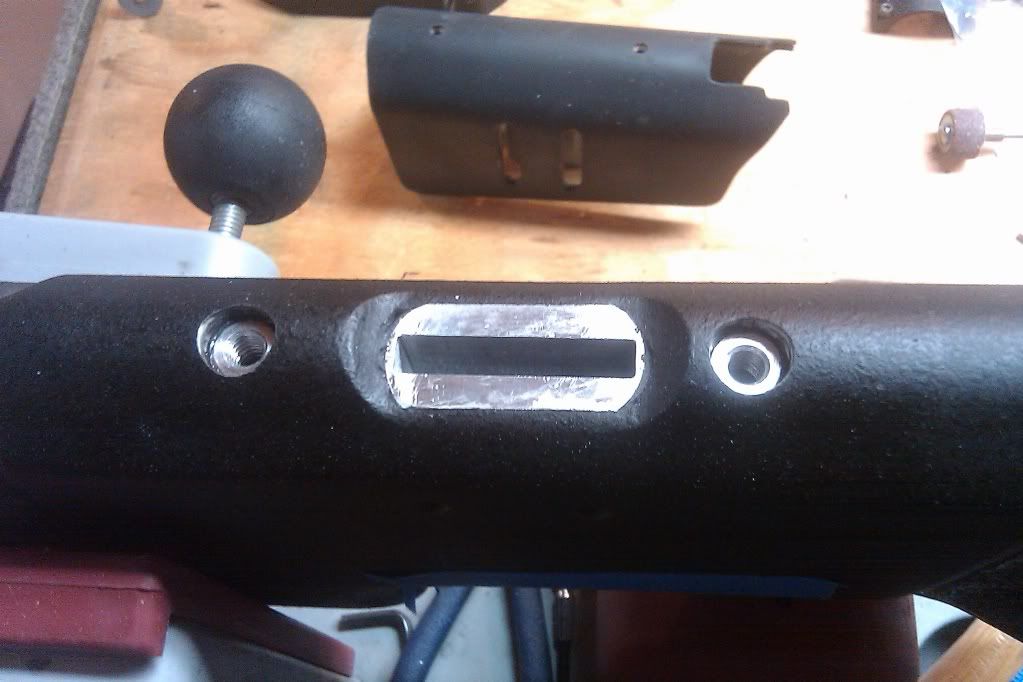
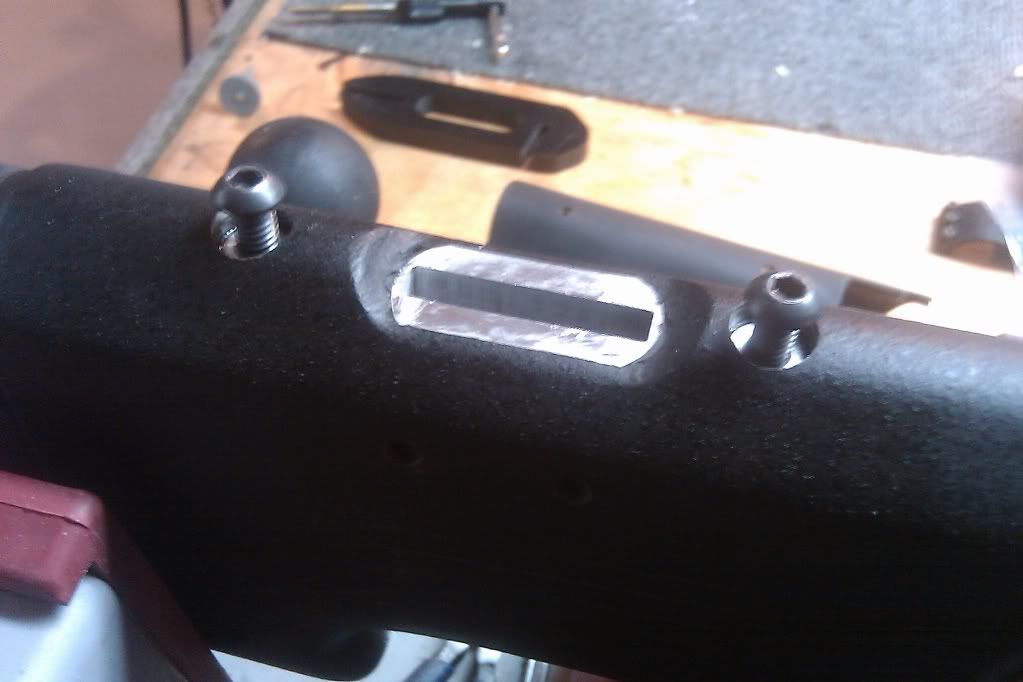
7. After your epoxy has hardened up, 2-3 hours for the Marine-Tex, gently back the screws out of the pillars and set them aside. At this point, clean any remaining epoxy off the top of the pillars. At this time, also clean up the screws. See next pic.....
8. After our epoxy has set up. We are ready to thread our screws back into the pillars.
Ta-Da!.......
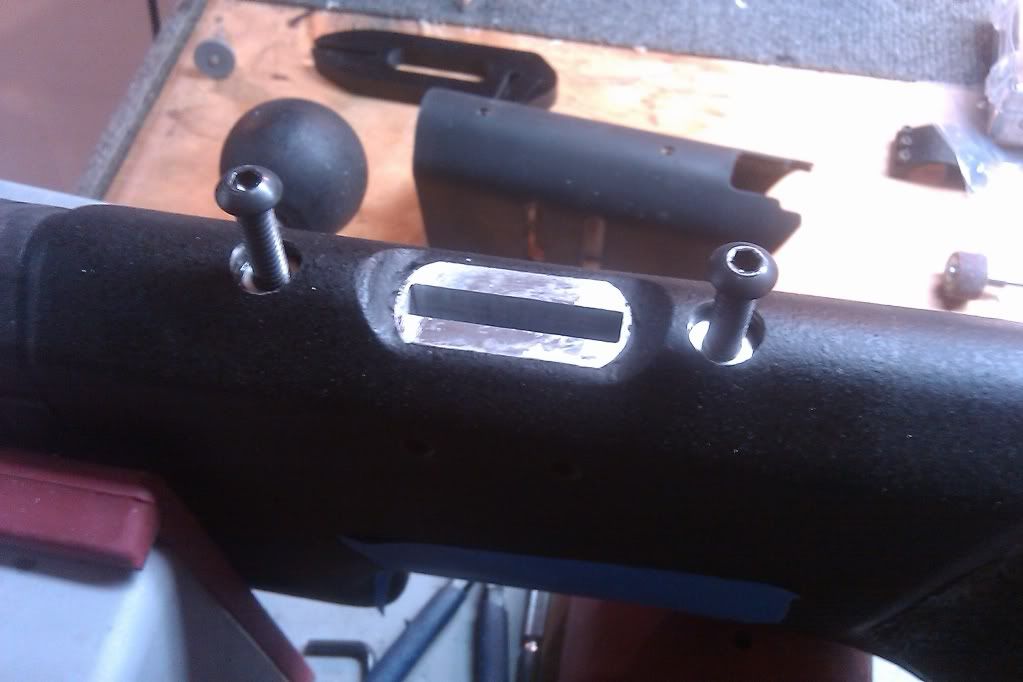
9. Now we are ready to put the saddle back on and adjust for height.........
10. After you have the saddle adjusted to suit you, you can remove the saddle at any time and be certain it'll go back the same EVERY time. Not to mention, it'll save you from having your cheek weld go to hell in a handbasket in the middle of a string of fire (like what happened to me). Here's a pic after I adjusted the saddle to suit me.......
Total time on the install is about 30-45 minutes and takes longer for the Marine-Tex to cure than the install itself. Cost on materials (screws, pillars and set screws) was about $3.50. The rest of the stuff (bits, tap, epoxy, etc.) I had on hand.
Hope this helps you guys out and is a very viable alternative for a quick and easy cure to your saddle slippage woes!